1. From your OneLogin admin portal, select Applications then the Add App button to add an integration from the catalog.
2. In the search box, type “continu” and select the top SAML2.0 application.
3. Change the display name if desired, and click save to add the integration.
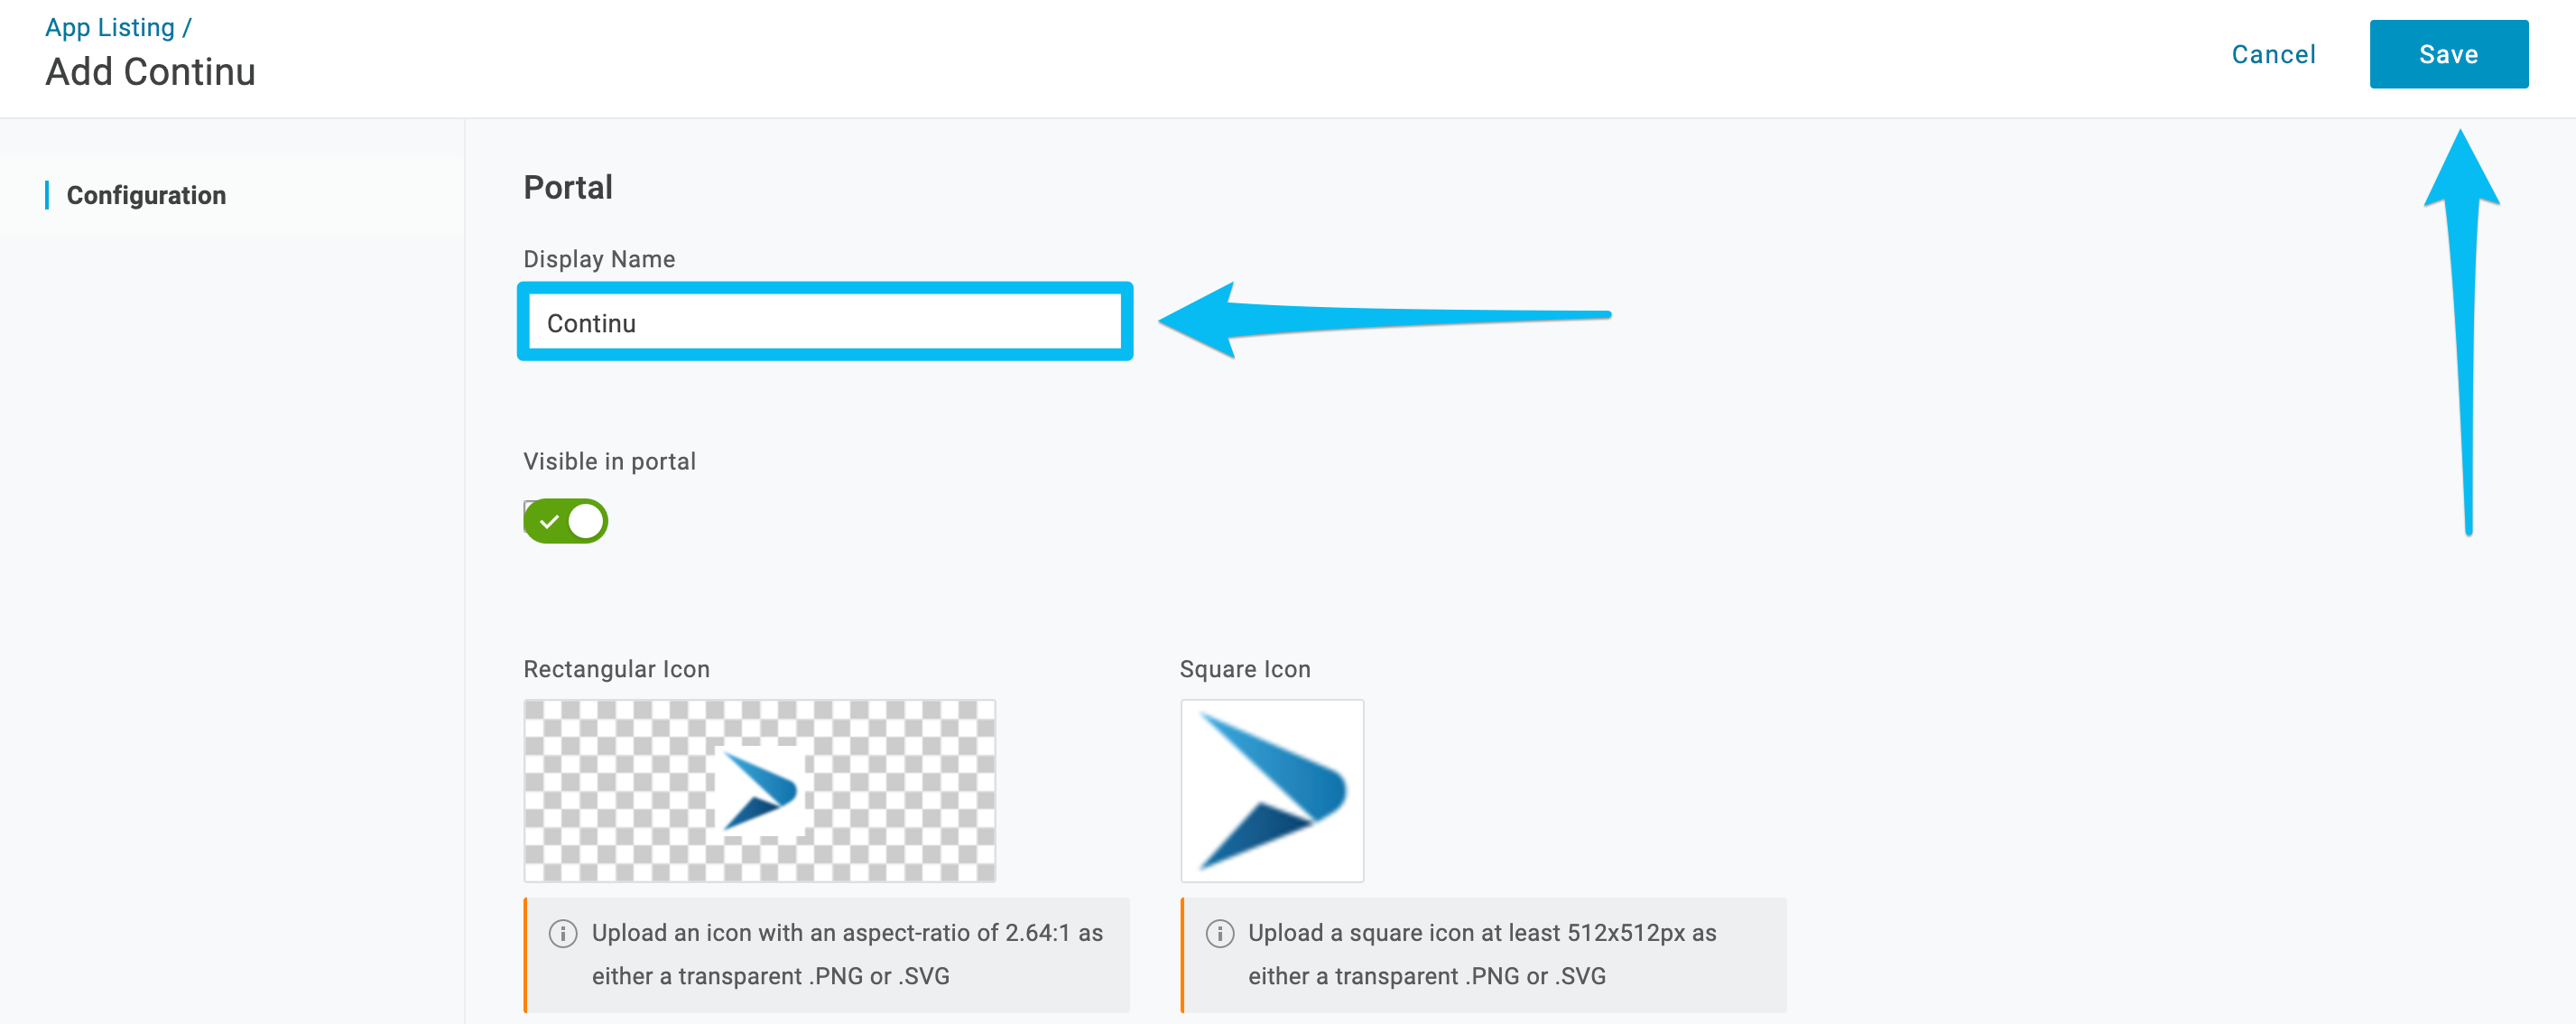
4. Click on the configuration tab to add the subdomain and enter the subdomain of your Continu instance here. (For example, if the URL you access Continu with is
https://goodcompany.continu.co, you would type goodcompany in this input). After entering the subdomain, click
save.
5. Click on the parameters tab.
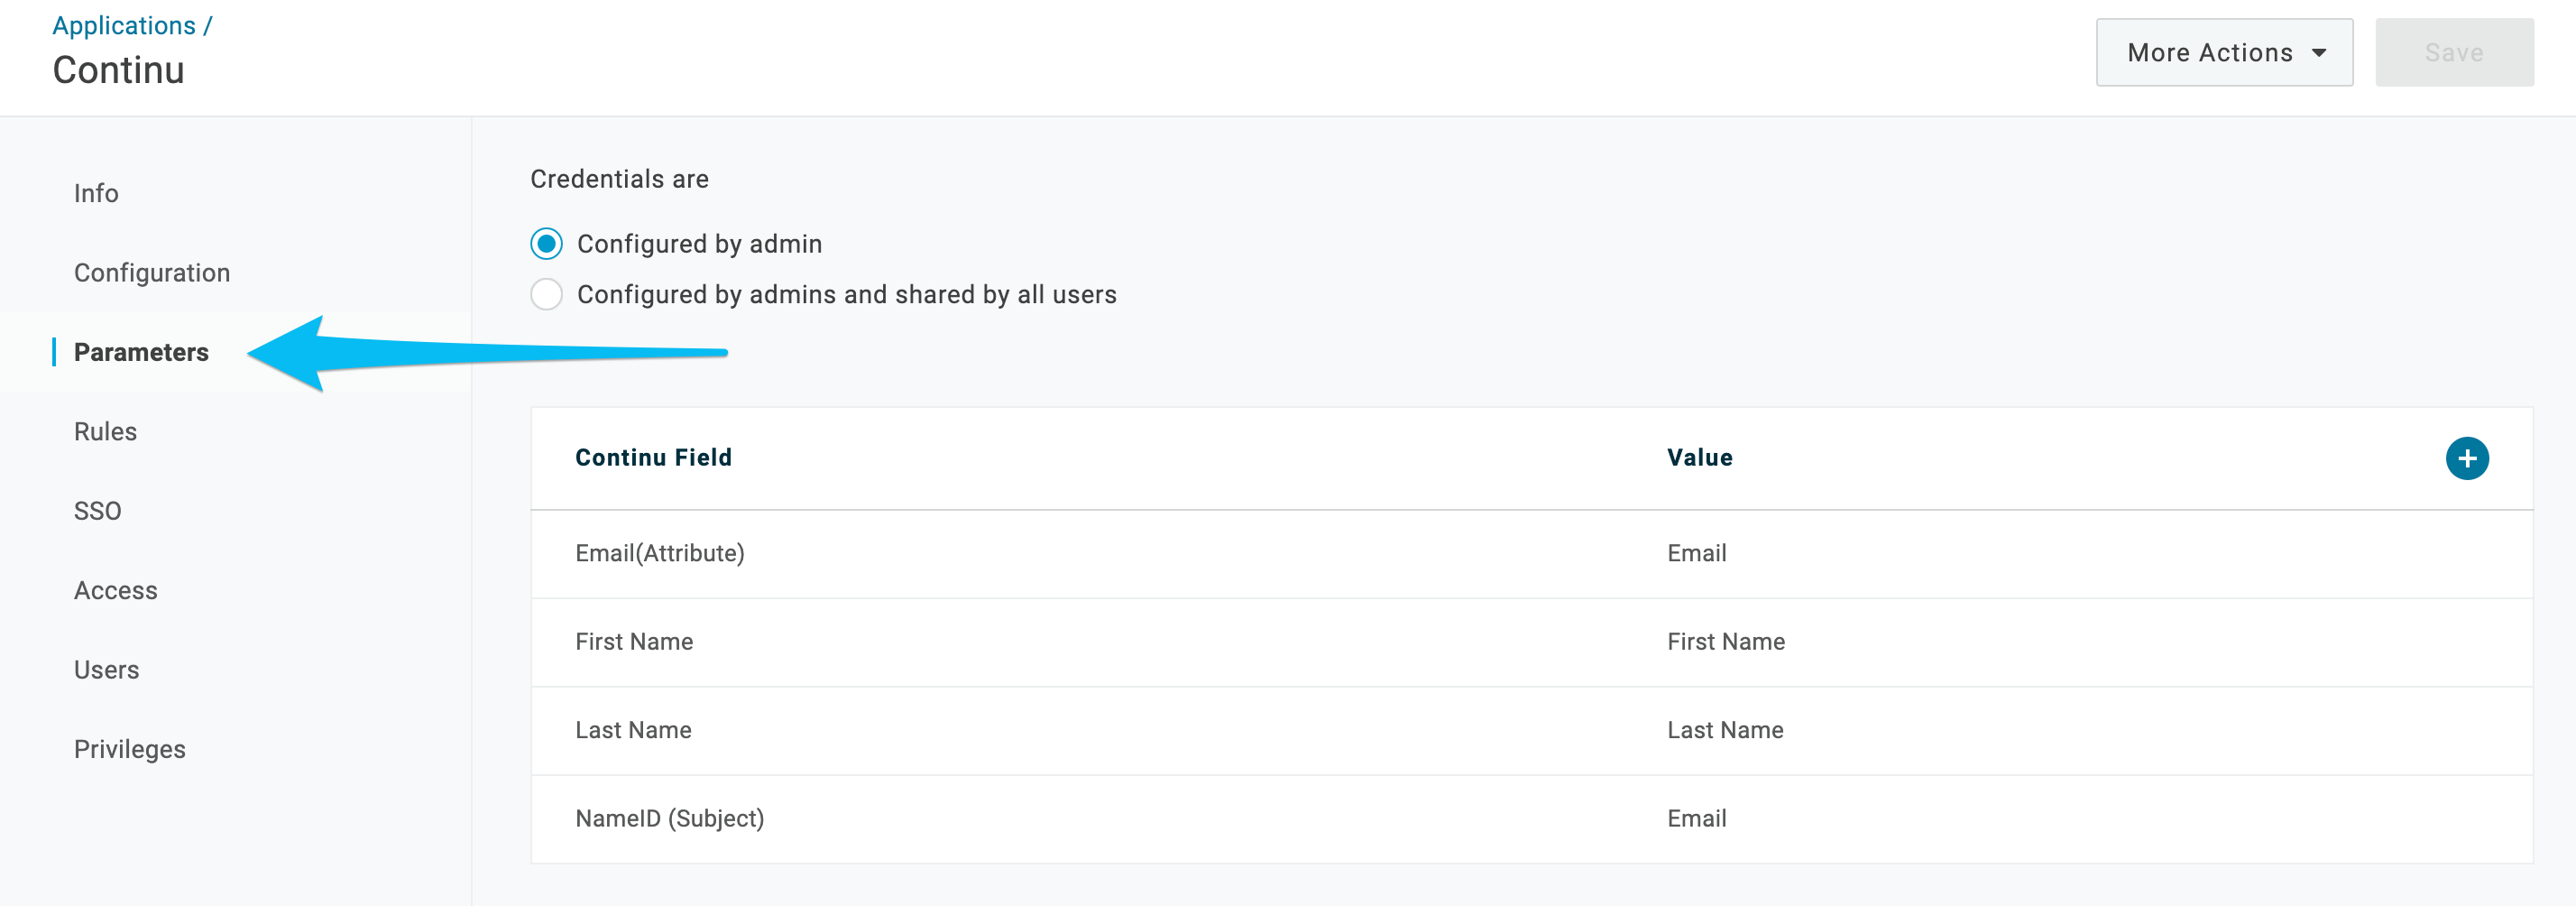 6.
6. The default parameters are already set up and are sufficient for the integration. If you would like to pass additional information with the user, to be saved in Continu, select the
+ icon. Otherwise, skip to Step 12.
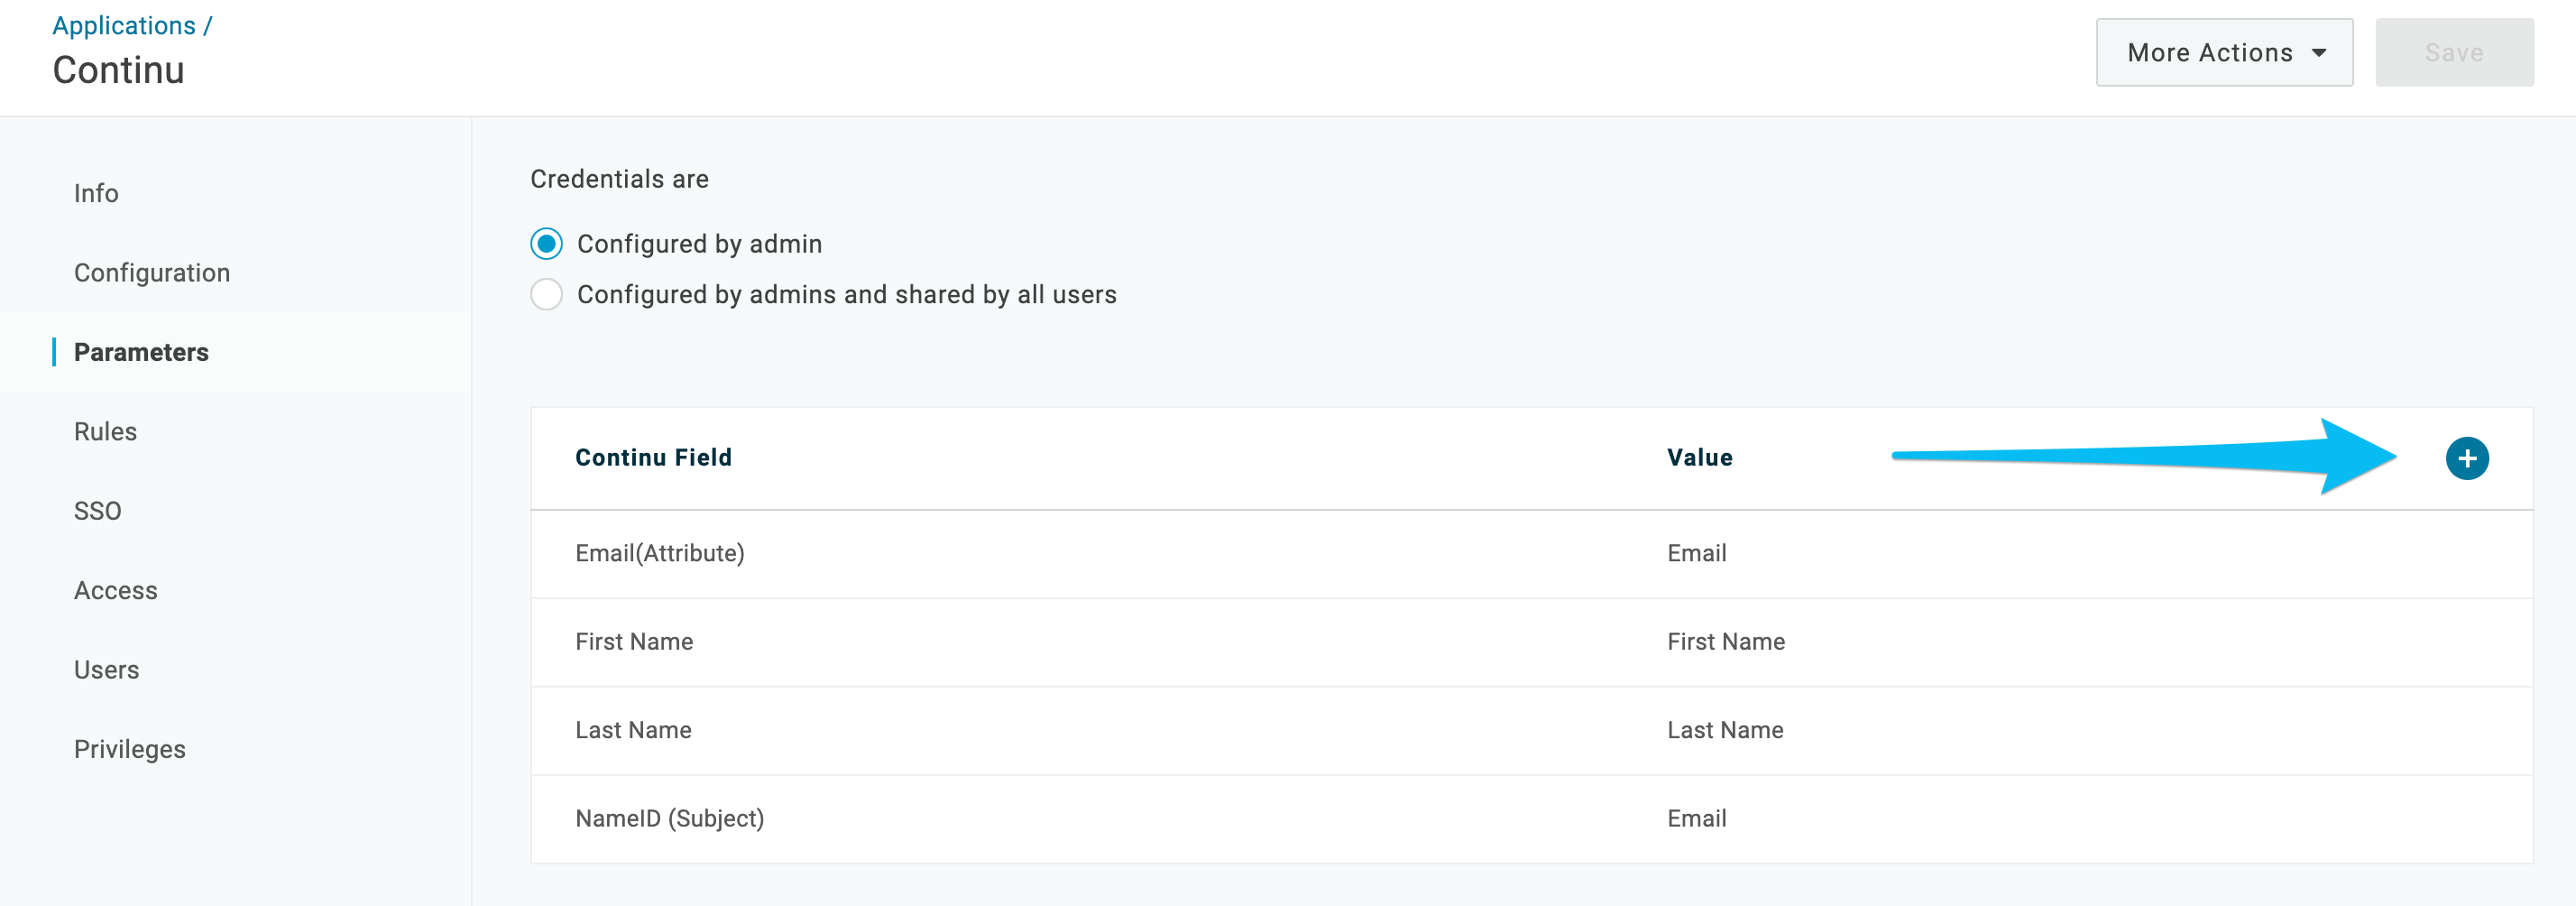 7.
7. In the Field name input, type the name of the field that Continu is expecting.
There is a list of acceptable parameters at the end of these instructions. Check the flag labeled “Include in SAML assertion” and click save.
8. In the following box that pops up, select the appropriate value in the value drop down and click save.
Repeat steps 6-8 for any additional parameters and click save.
9. Click the SSO tab.
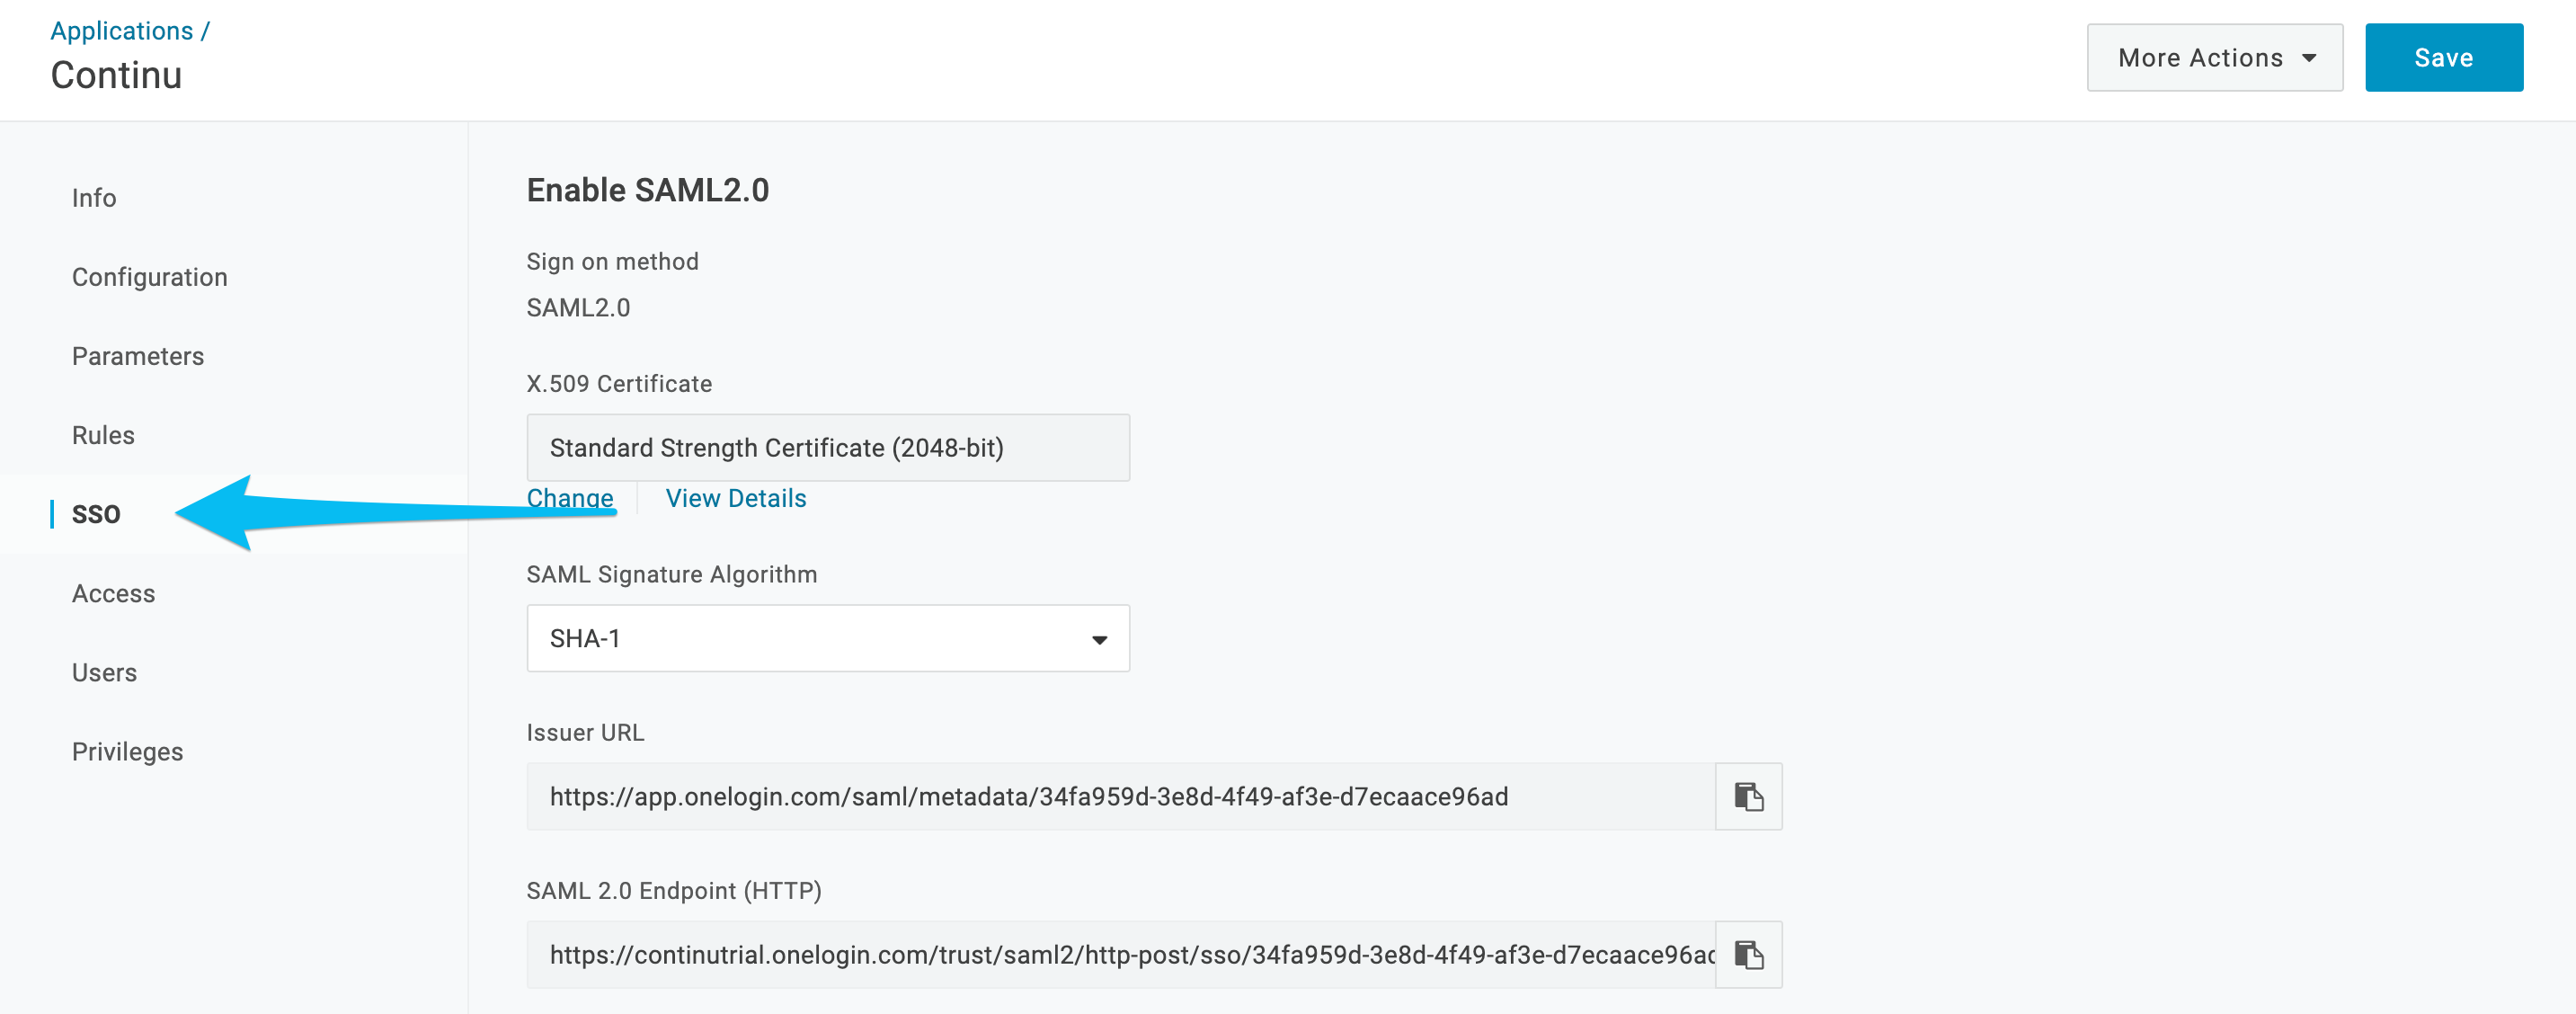
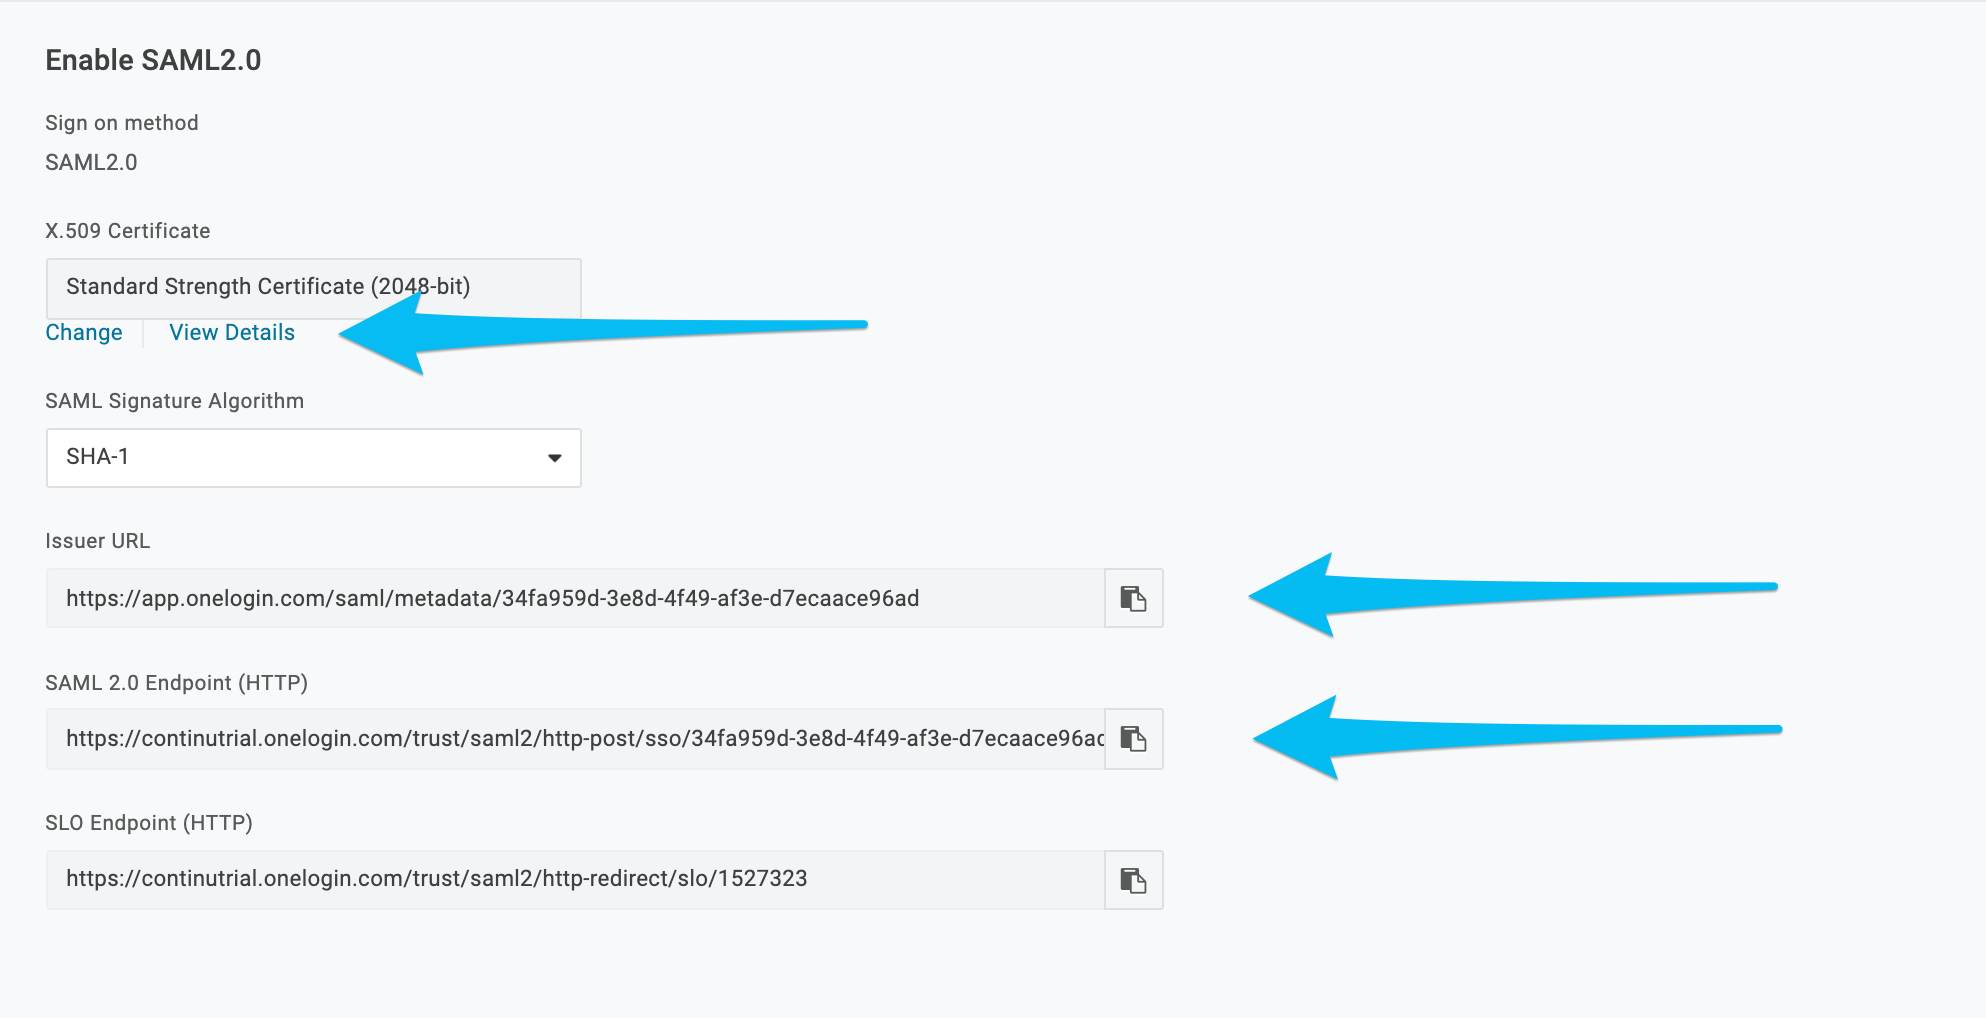
10. There are 3 pieces of information necessary to configure the SAML integration within Continu. The first is the Issuer URL which can be copied from this screen by selecting the clipboard icon next to the input. Second is SAML 2.0 Endpoint. The third piece of information is the certificate itself. To navigate to the certificate, first click View Details below the X.509 Certificate input. (Note: This information will be used later)
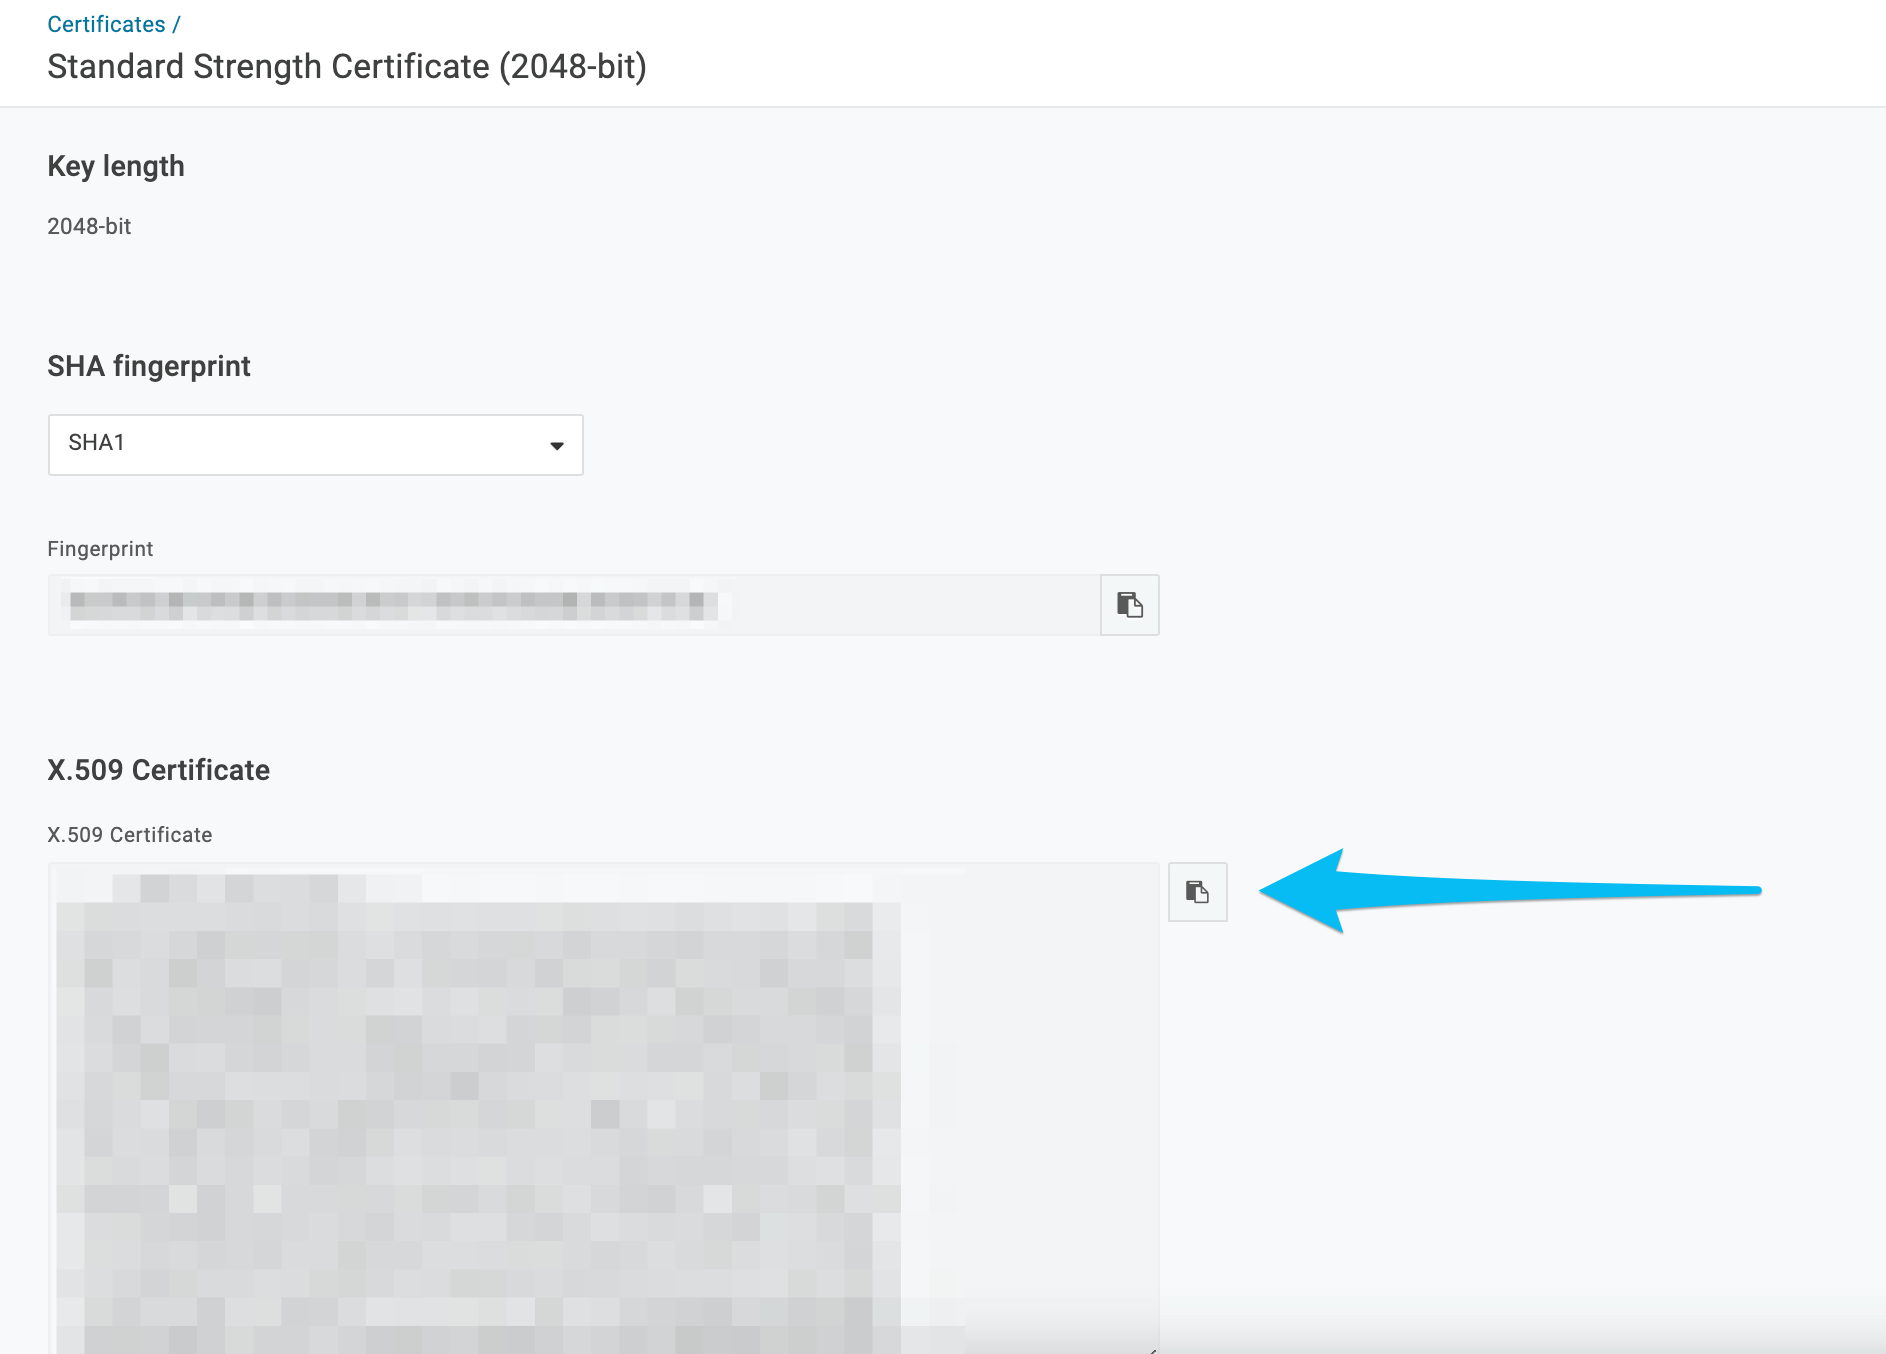
11. The certificate information can be copied by clicking the clipboard icon next to the X.509 Certificate input. This information will be used in Step 17.
 12.
12. Navigate to your Continu instance:
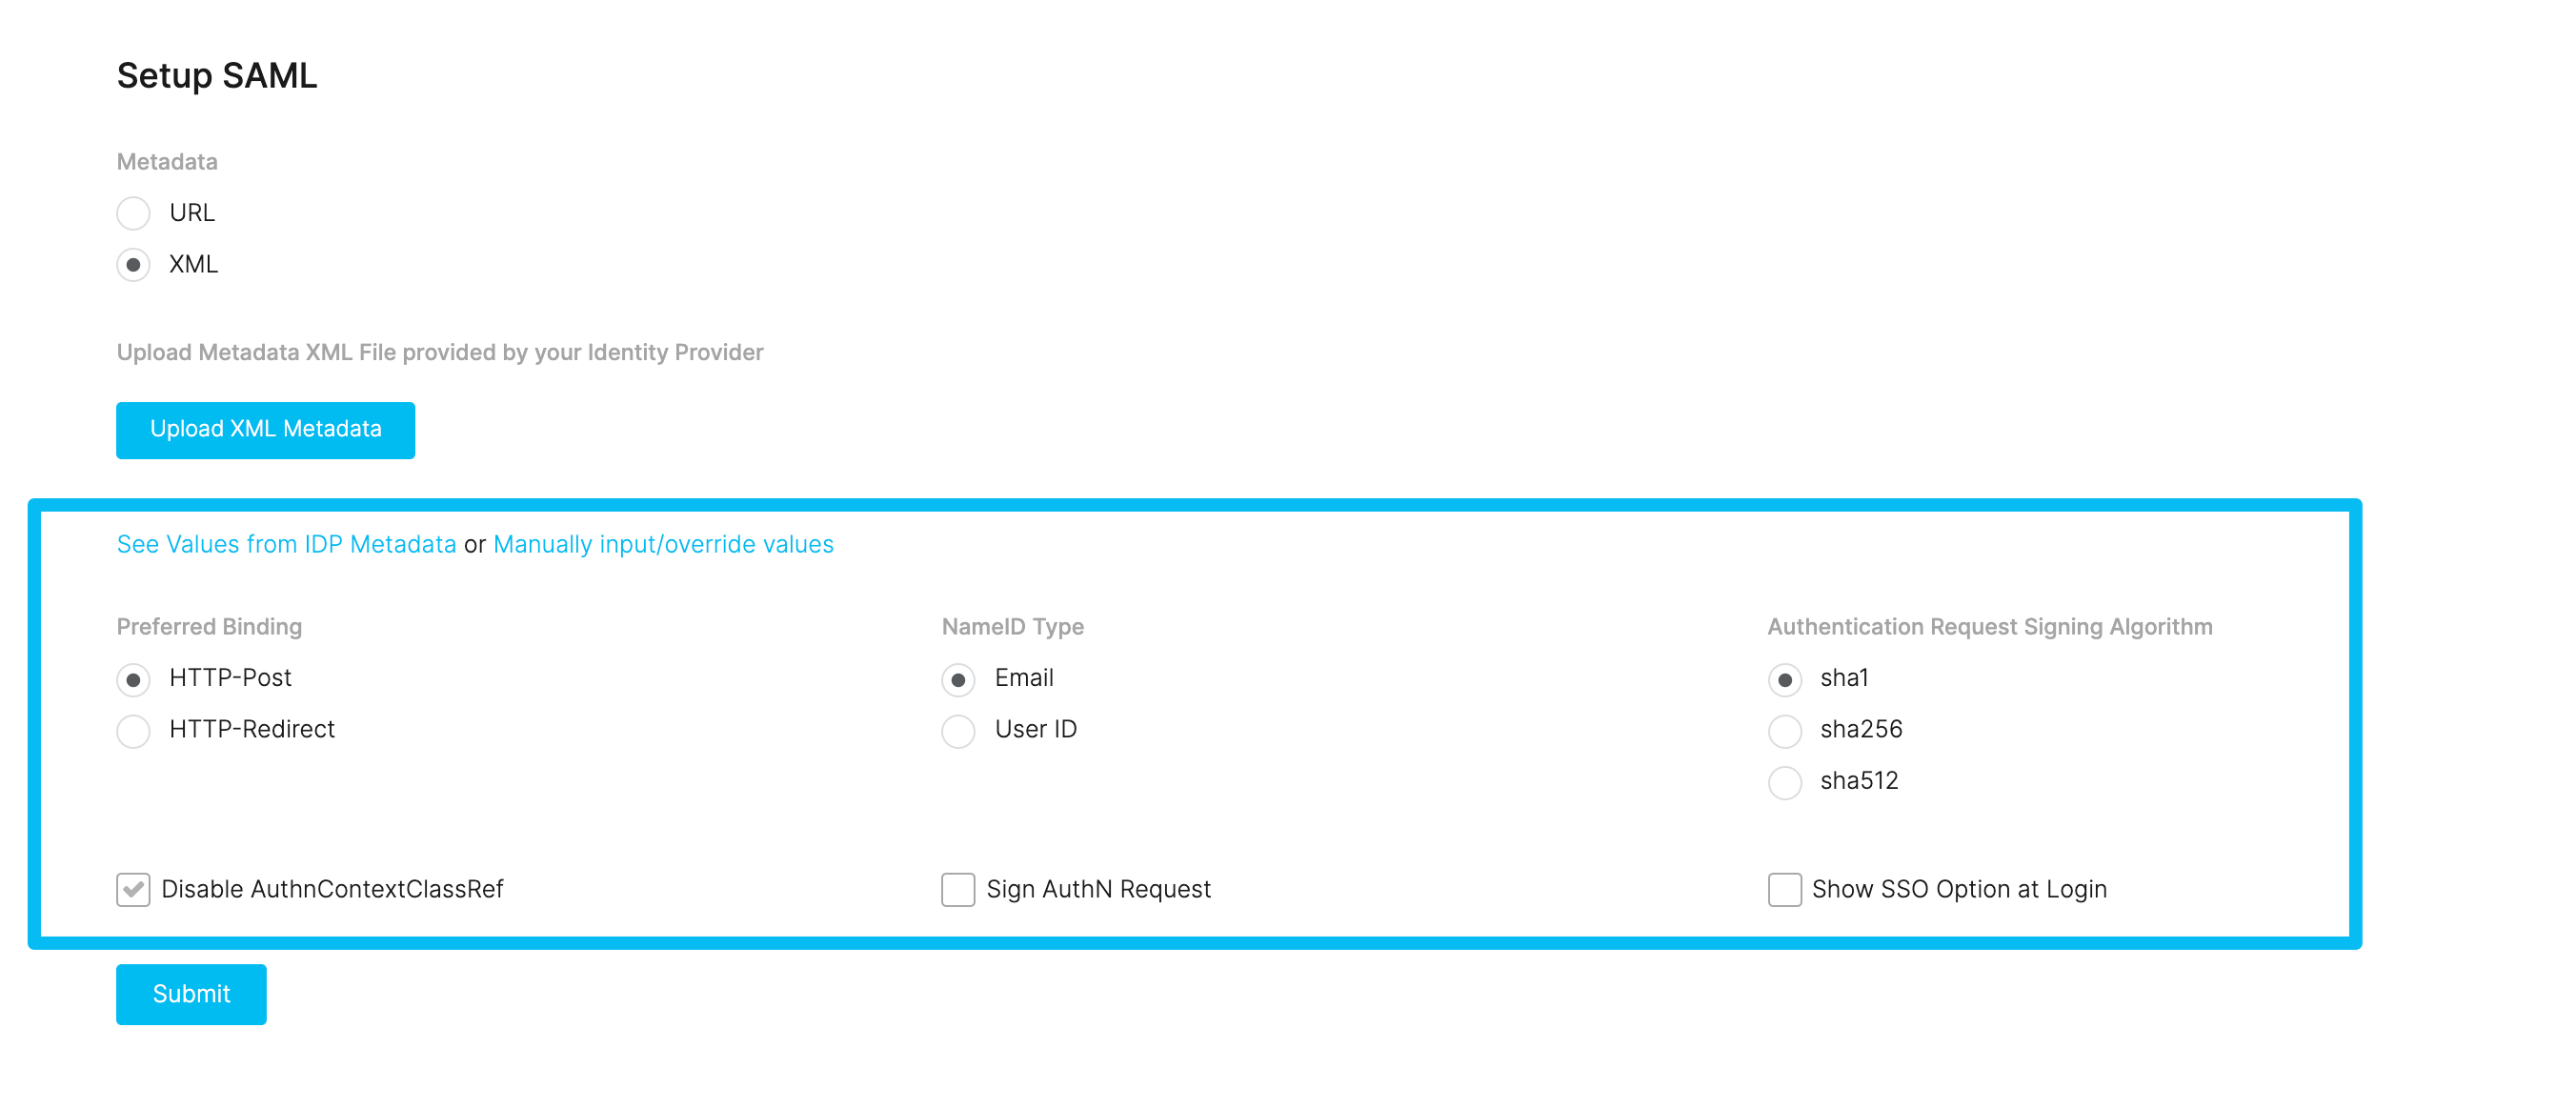
https://yourcompany.continu.co/#/saml. Click on the URL option for metadata, then paste the Issuer URL from SAML 2.0 Endpoint information from Step 10 into the SAML 2.0 Endpoint input and paste the X.509 Certificate information from Step 11 into the X.509 Certificate input and click
Submit at the bottom of the page.
If successful, a green success box will appear. For help with any of the additional settings or if there is an error, reach out to your OneLogin administrator.
Congratulations! The integration is now complete. Be sure to open the integration to the users you wish to have access.
Accepted Parameters
The following fields are acceptable to be passed through sso and will be saved each time a user logs in or is created via the SAML integration:
role - a lowercase string value accepted as “user” “admin” or “creator”.
hired - a string value representing a date in “MM-DD-YYYY” format.
image - a string value of a url representing a users profile image.
job_title - a string value representing a users job title.
location - a string value representing a users location with a hierarchy based on the | symbol. (If a location is passed that does not exist within the application, a new location will be created to accommodate it).
For Example - a value of “United States|California|San Francisco” would create 3 locations assuming they did not exist. Please Note: It is acceptable to have a single item (i.e. “California”) or 2 items as well (i.e. “California|San Francisco”).
department - A string value representing a users department with a hierarchy based on the | symbol. Please Note: This works the same way as location
________
For more information on OneLogin, please see www.onelogin.com